 martinberger.swiss
The Case
A kernel update via DNF on an OCI Base DB System node running Oracle Linux caused a boot failure after reboot. The node was no longer reachable via SSH. The OCI Work Request showed an error during the start process.
The dbcli job itself reported success - which made it harder to spot at first:
[root@db-sys ~]# dbcli describe-job -i 0e692842-943f-4cee-9c48-545f01d5cd93

Job details
----------------------------------------------------------------
                     ID:  0e692842-943f-4cee-9c48-545f01d5cd93
            Description:  OS Patching
                 Status:  Success
                Created:  June 19, 2026 at 7:40:08 AM CEST
               Progress:  100%
                Message:
             Error Code:

Task Name                                                                Start Time                          End Time                            Status
------------------------------------------------------------------------ ----------------------------------- ----------------------------------- ----------
The OCI Work Request showed a boot error:

Console Connection
With SSH unreachable, the serial console connection is the only way to access the node. Create the connection in the OCI Console on the DB System detail page under the Console connections tab. Use a dedicated SSH key pair.
Official documentation: Manage Serial Console Connection to the DB System
For troubleshooting, an OCI Compute Instance in the same subnet running Oracle Linux 9 is used as the SSH client.
The console connection shows as Active in OCI:
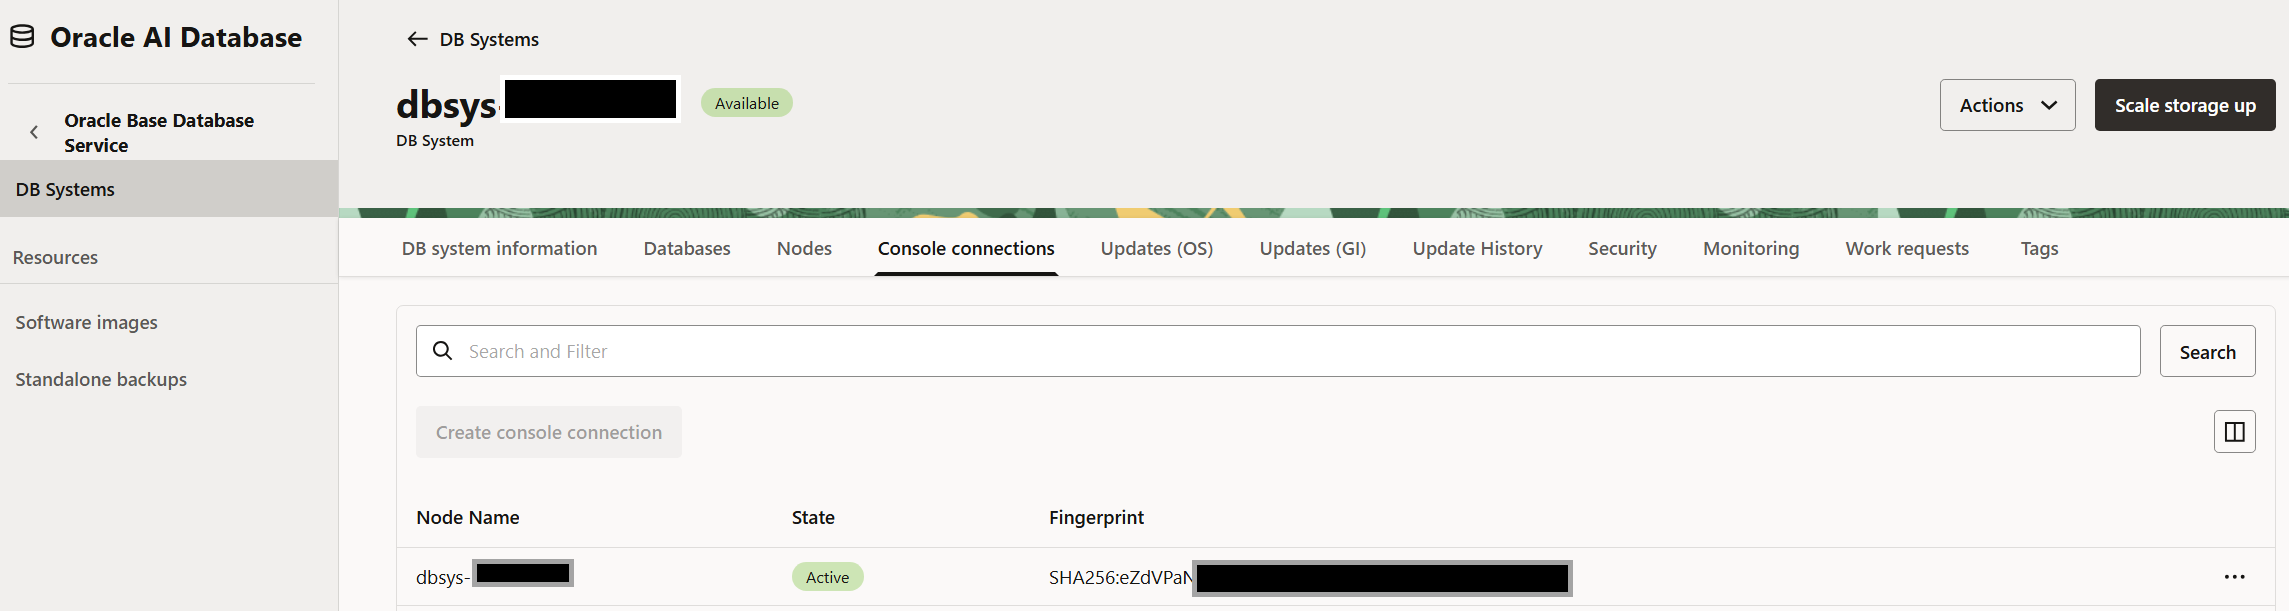
OCI generates the SSH command. It tunnels through port 443 using a ProxyCommand. Copy it directly from the OCI Console - do not construct it manually, example:
ssh -o ProxyCommand='ssh -i <your-console-connection-ssh-key> -W %h:%p -p 443 ocid1.instanceconsoleconnection.oc1.eu-zurich-1.an5heljrobkmuhycistozapdvexrajpdhdqd6wcuvdhp123456789@instance-console.eu-zurich-1.oci.oraclecloud.com' ocid1.instance.oc1.eu-zurich-1.an5heljrobkmuhyc4rjn6hrppnzcwbsi2xn3t4spvoxetkedo123456789
The Console Connection fails: UNKNOWN port 65535: error in libcrypto
Running the OCI-provided SSH command fails immediately:
ssh_dispatch_run_fatal: Connection to UNKNOWN port 65535: error in libcrypto
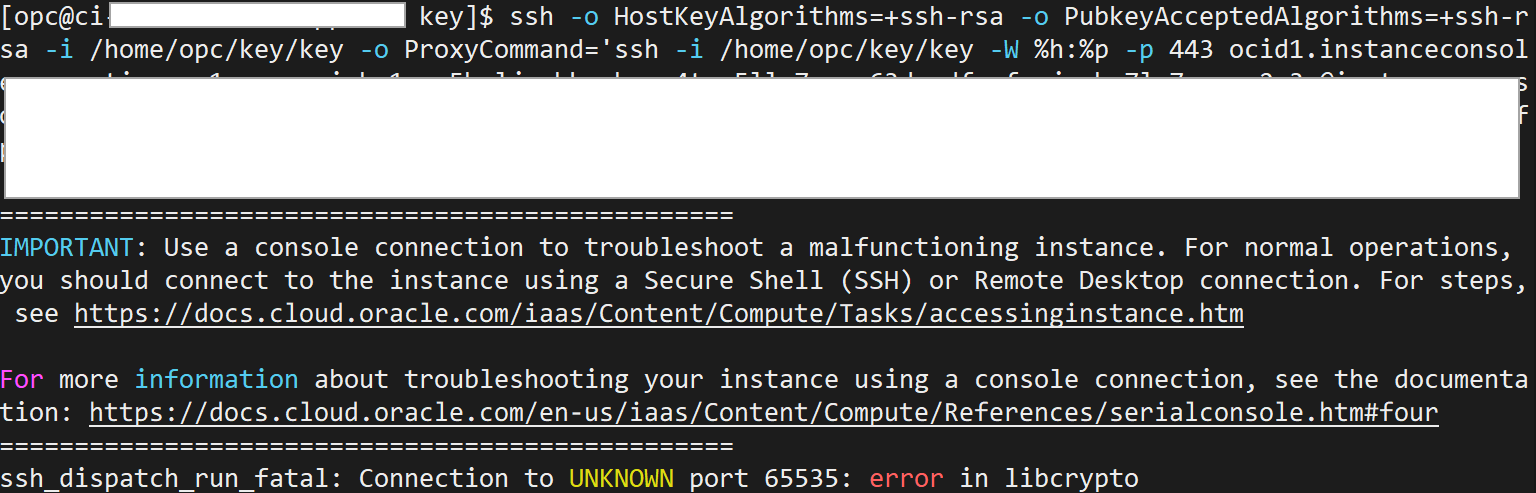
Tried without success:
- Recreate console connection
- Upload a different RSA key
- Run SSH with
-vvvfor verbose output
Root cause: The DEFAULT system-wide crypto policy on OL9/RHEL9 with OpenSSL 3.x blocks RSA operations used by the OCI console SSH command. The DEFAULT policy enforces a 2048-bit RSA minimum and stricter algorithm requirements that the OCI console server does not meet.
Check the active policy:
$ update-crypto-policies --show
DEFAULT
Switch to LEGACY temporarily:
$ sudo update-crypto-policies --set LEGACY
Setting system policy to LEGACY
Note: System-wide crypto policies are applied on application start-up.
It is recommended to restart the system for the change of policies
to fully take place.
The LEGACY policy lowers the RSA minimum to 1024 bits and enables broader algorithm compatibility. No reboot is needed - the policy takes effect for the next new process, and SSH is a new process per connection.
Run the same OCI SSH command again. No error. The terminal appears to hang - you are connected to the serial console.

What the Console Shows - Kernel Panic
The first thing visible on the serial console is the kernel panic from the failed boot:
[    0.498198] Kernel panic - not syncing: VFS: Unable to mount root fs on unknown-block(0,0)
[    0.499769] CPU: 1 PID: 1 Comm: swapper/0 Not tainted 5.4.17-2136.355.3.4.el8uek.x86_64 #3
[    0.501381] Hardware name: QEMU Standard PC (i440FX + PIIX, 1996), BIOS 1.6.4 02/27/2023
[    0.502904] Call Trace:
[    0.503435]  dump_stack+0x6d/0x8f
[    0.504032]  panic+0x114/0x302
[    0.504661]  mount_block_root+0x2e1/0x308
[    0.505454]  ? do_early_param+0x99/0x99
[    0.506165]  mount_root+0x7c/0x83
[    0.506822]  prepare_namespace+0x139/0x175
[    0.507662]  kernel_init_freeable+0x275/0x29f
[    0.508469]  ? rest_init+0xb4/0xb4
[    0.509104]  kernel_init+0xe/0x10d
[    0.509789]  ret_from_fork+0x2e/0x39
[    0.510470] fbcon: Taking over console
[    0.510512] Kernel Offset: 0x11a00000 from 0xffffffff81000000
[    0.513244] ---[ end Kernel panic - not syncing: VFS: Unable to mount root fs on unknown-block(0,0) ]---
Reboot - Select the Previous Kernel
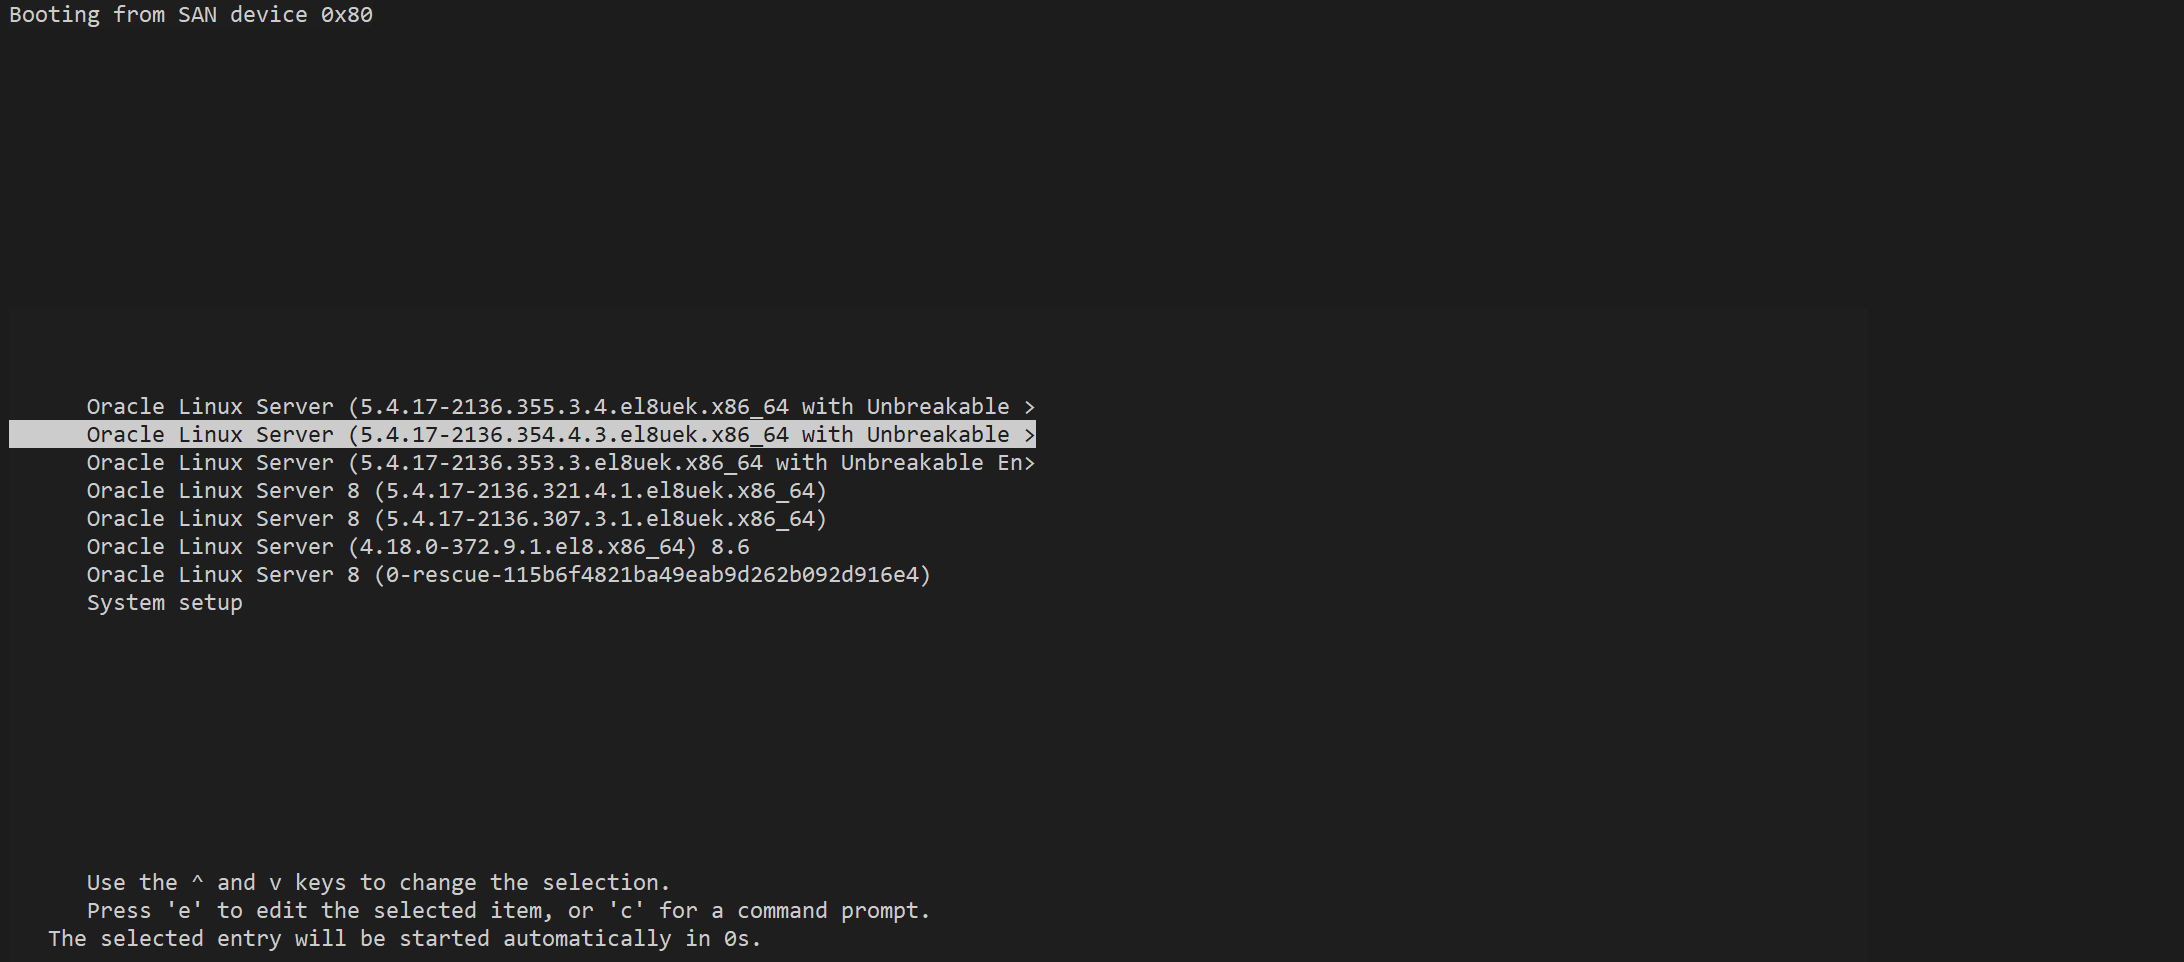
We reboot in OCI console the database node, the console connection screen is updated. The GRUB menu appears. Select the previous working kernel version.
Root Cause - Missing initramfs
Working with My Oracle Support, the root cause was identified.
During the kernel update, /var/tmp (977 MB total) was over 90% full. There was not enough space to build the initramfs image for the new kernel. GRUB was already reconfigured to boot the new kernel - but the initramfs was missing. Without initramfs, the kernel cannot mount the root filesystem. Hence the panic.
Listing /boot confirms it:
initramfs-5.4.17-2136.353.3.el8uek.x86_64.img
initramfs-5.4.17-2136.354.4.3.el8uek.x86_64.img

Missing:
initramfs-5.4.17-2136.355.3.4.el8uek.x86_64.img
Recovery
Step 1 - Enter Emergency Mode
In the GRUB menu, select the previous kernel 5.4.17-2136.354.4.3.el8uek.x86_64. Append rd.break to the kernel parameters. This drops into emergency mode before the root filesystem is mounted.
Step 2 - Mount and chroot
mount -o remount,rw /sysroot
mount /dev/sda2 /sysroot
mount /dev/sda1 /sysroot/boot/efi
chroot /sysroot
Step 3 - Free Disk Space on /var/tmp
Clear unnecessary temporary files under /var/tmp. Verify there is enough space before the next step.
Step 4 - Regenerate the Missing initramfs
dracut -fv /boot/initramfs-5.4.17-2136.355.3.4.el8uek.x86_64.img 5.4.17-2136.355.3.4.el8uek.x86_64
Step 5 - Safety Reboot With the Previous Kernel
Set GRUB to the previous working kernel as a safety net:
grubby --set-default /boot/vmlinuz-5.4.17-2136.354.4.3.el8uek.x86_64
Reboot and verify the new initramfs image is now present in /boot.
Step 6 - Switch Back to the New Kernel
grubby --set-default /boot/vmlinuz-5.4.17-2136.355.3.4.el8uek.x86_64
Reboot. The node comes back up on the new kernel. SSH access is restored. Verify by uname - for Kernel version.
uname -r
5.4.17-2136.355.3.4.el8uek.x86_64
Other Error: no matching host key type found
If you have another issue when trying to connect like Unable to negotiate with UNKNOWN port 65535: no matching host key type found. Their offer: ssh-rsa - add this to your local client SSH configuration:
sudo vi /etc/ssh/ssh_config
Add the following lines at the end:
HostkeyAlgorithms +ssh-rsa
PubkeyAcceptedAlgorithms +ssh-rsa
sudo update-crypto-policies --set DEFAULTdbcli update-kernel command. It verifies available space before proceeding. This command has already run successfully several times in this environment. Official Oracle documentation for this command is not yet available at the time of writing.